


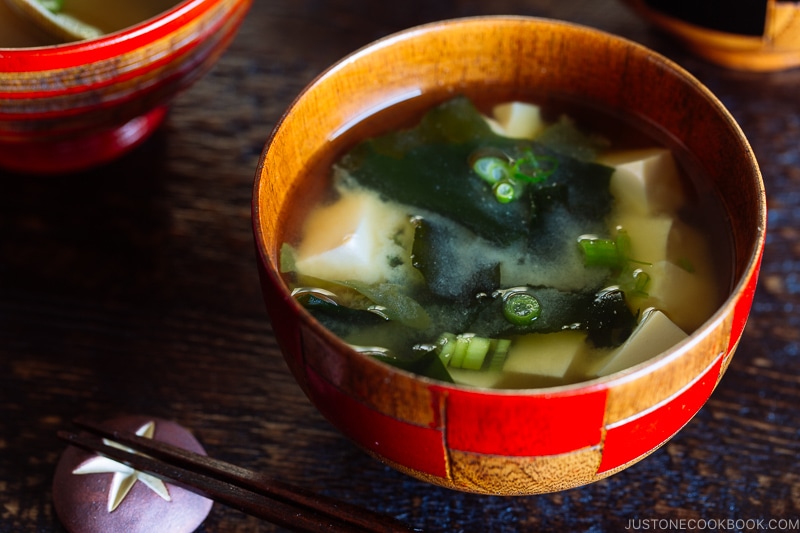
It’s super easy to make authentic Japanese miso soup at home! As the daily elixir of the Japanese diet, homemade miso soup is not only delicious, it also brings many great health benefits. Learn how to make this nourishing soup at home with my recipe tutorial and cooking video.
Homemade Miso Soup
INGREDIENTS
For Dashi (makes scant 4 cups)
- 4 cups water (960 ml)
- ⅓ oz kombu (dried kelp) (10 g or 4" x 4" or 10 cm x 10 cm)
- ⅓ oz katsuobushi (dried bonito flakes) (10 g or 1 cup; I used 3 cups in the video for strong dashi flavor)
INSTRUCTIONS
Make Dashi (Can be Made in Advance):
- Clean kombu with a damp towel. Wipe off any unclean particles. NEVER wash kombu and do not remove the white substance -that’s umami! Soak the kombu in water for 30 minutes or overnight (preferred).
- After 30 minutes, kombu is rehydrated. This liquid is called cold brew Kombu Dashi.
- Pour kombu dashi into a saucepan and SLOWLY bring to boil on medium-low heat. You want to extract umami from kombu as much as possible. Right before boiling, discard the kombu (you can make Simmered Kombu or Homemade Furikake (Rice Seasoning)). If you leave kombu inside, it gets slimy and leaves a bitter taste; therefore, we always remove it. If you’re vegetarian/vegan, use this kombu dashi for your miso soup and proceed to Step 2. If you’re not, proceed to the following step.
- Add Katsuobushi and let it simmer for 30-60 seconds. Turn off the heat and let steep for 10 minutes.
- Strain over a fine-mesh sieve and the stock is ready to use! This is called Awase Dashi. You can keep in the refrigerator for up to 3-5 days in the refrigerator and up to 2 weeks in the freezer. Repurpose used katsuobushi to make Homemade Furikake (Rice Seasoning).
- You have roughly 4 cups dashi. The following Miso Soup recipe requires 2 cups dashi for 2 servings. Save the half for later, OR double the recipe and finish up all the dashi. Add the dashi into a saucepan.
- Are you in a hurry? Use Dashi Packet or Dashi Powder to make instant dashi.
Make Miso Soup:
STEP 1 - Add dense ingredients BEFORE bringing dashi to a boil
- If your miso soup doesn't include hard ingredients or clams, go to next step. In a soup pot, add dashi and hard ingredients like root vegetables. Once boiling, lower the heat and simmer until they become tender. If you're making Clam Miso Soup, add clams in pre-boiling kombu dashi. Once the shells are open, turn off the heat (do not overcook).
STEP 2- Add quick-cooking ingredients after dashi is boiling
- If your miso soup doesn’t include these ingredients, bring dashi to a boil and go to next step. AFTER dashi starts boiling, add in soft vegetables like leafy greens, mushrooms, deep-fried tofu pouch because they require less cooking time. At this point, keep the soup at a simmer and make sure it stays warm (not OVERBOILING).
STEP 3: Add miso
- Add a small amount of miso at a time (you can start with 2 Tbsp miso for 2 cups dashi). Put miso inside a ladle and slowly add dashi into the ladle to dissolve miso completely. You can buy a miso muddler or a fine-mesh miso strainer which helps you dissolve miso faster. If you accidentally added too much miso, dilute the miso soup with dashi (or water). NEVER OVERBOILmiso soup because it loses nutrients, flavors, and fragrance.
STEP 4: Add tofu
- Add tofu AFTER miso is completely dissolved because you might break the tofu when mixing in miso. If you add chilled tofu from the refrigerator, miso soup would get cooler. Reheat miso soup until it is just hot, but NOT OVERBOIL.
STEP 5: Add wakame & green onions
- Add rehydrated wakame (seaweed). I recommend re-hydrating dried wakame in a separate bowl of water to get rid of saltiness, instead of re-hydrating inside miso soup. Add ingredients that do not require cooking such as chopped green onions, mitsuba, yuzu, and blanched spinach right before serving to keep the fresh
STEP 6: Serve
- Serve immediately. Place on the right side of the table setting
Storage
- In general, it's best to use up all the miso soup because the fragrance and taste will be lost as time passes by. Let your miso soup cool at room temperature (up to 4 hours - otherwise miso soup will be spoiled) and then refrigerate. You can keep for up to 2 days in the refrigerator. If you want to make a big batch, it's best to keep the soup BEFORE adding miso. Add the miso only for the portion you need. You can freeze miso soup for up to 2 weeks. If the miso soup contains potatoes or tofu, remove them before freezing as the textures subject to change.
Reheating Miso Soup
- In a pot, bring miso soup to warm temperature, but CAREFUL not to overboil. Miso loses its nutrients at high temperature.
Комментариев нет:
Отправить комментарий