


Using a brotform is (I'm sorry to say) the easiest part of making bread.
When your favorite dough—or the one you're working up to this month—is ready for its second rise...- Flour the basket generously (sift flour directly over top of it and rub some into the coils—too little flour and your dough might stick or the markings may not be visible). If you just want the shape benefits without the distinctive markings, line the basket with a floured tea towel.
- Plop your shaped dough in, nice side down.
- Give it some breathing room (that is, cover in a tea towel or as directed and leave it alone) while it takes the second rise.
- Flip the dough out of its cozy-basket-home and onto whatever implement you'll use to transfer it to the oven—a cornmeal-dusted baking peel, a piece of parchment paper...
- Make a slash in the dough using a serrated knife, lame, or straight razor so that the steam can escape from the bread in a controlled manner.
- Bake as directed in the recipe (or as you prefer! I like to use a preheated Dutch oven).
5-Minute Artisan Bread
Makes four 1-pound loaves
- 3cups (24 ounces) water, plus more for baking the bread
- 1tablespoon (.35 ounce) yeast (active dry, instant, quick rise, or bread machine is fine)
- 1 to 1 1/2tablespoons (.6 to .9 ounce) kosher or other coarse salt, to taste
- 6 1/2cups (2 pounds) unbleached all-purpose flour, measured by the scoop-and-sweep method
- Cornmeal, for dusting (optional)
- Warm the water so that it's slightly warmer than body temperature—about 100° F (warm to touch, but not hot).
- In a large bowl mix the yeast, warm water, and salt. Don't worry about getting the yeast to dissolve.
- Add the flour all at once, then use a spoon to mix until the flour is completely incorporated and you have a blobby dough. (If it becomes difficult to stir, use very wet hands to press the mixture together.) Don't knead the dough—you want it to be wet and loose; just be sure there are no dry flour patches.
- Loosely cover the container and let the dough hang out at room temperature for about 2 hours, until it begins to rise and collapse/flatten on the top. (Leite says: "Relax. It’s bread dough, not a newborn. You don’t need to monitor it constantly. And don’t worry about the dough being precisely double or triple its original volume as you would with a traditional bread recipe. Just walk away, go about your business, and come back in 2 hours. Seriously.")
- After those 2 hours, stash the container in the fridge. If you're using a lid, leave it cracked open for the first couple of days before sealing it. I used a loose layer of plastic wrap. You can bake the dough any time after the initial 2-hour rise, but it will be less sticky once it's been refrigerated—it's best to leave it overnight before handling.
- Once refrigerated, the dough will seem to have shrunk, but don't worry. Do not punch the dough down, as you're trying to retain as much gas as possible. You can use the dough anytime within 14 days.
- When you want to bake a loaf, dust a pizza peel or upside down baking sheet with cornmeal or line with parchment paper; if you're using a banneton or brotform, sprinkle it generously with flour. Lightly flour a work surface. Measure a 1-pound piece of dough. Add just enough flour to the dough and your hands so that you can handle it without freaking out. Stretch the dough ever-so-gently and gather the outsides towards the middle, tucking the edges underneath. Using the counter for pressure, use your hands to drag and draw the dough quickly into a ball shape. Don't work it too much and don't worry about perfection.
- Place the shaped loaves on your pizza peel or baking sheet OR, if using a brotform, place it in the floured basket—the dough that rests against the basket will be the top of your loaf. Let it rest for 40 minutes. It may not rise much during this period, so don't stress.
- Preheat the oven to 450° F for at least 20 to 30 minutes. Preheat a baking stone, baking sheet, or a heavy Dutch oven (lid and pot, both—but separated) on a middle rack the entire time. If you're baking the bread on a stone or baking sheet (as opposed to a Dutch oven), place a cast-iron pan on any rack that will not interfere.
- If you let the dough rise on a peel or baking sheet, dust the top of the raised loaf with flour and use a serrated bread knife to slash a 1/2-inch deep cross on the top. If you let the dough rise in a basket, simply flip it out on a piece of parchment paper so that it's beautiful side is facing up, then make the cut.
- Transfer the loaf to the hot peel/baking sheet/pot in the oven. If your dough rose on a peel or sheet dusted with cornmeal, you'll have to push then pull it so that it lands on the hot stone or sheet or in the pot. If you've let it rise on parchment, you can simply lift the parchment and place the dough, parchment and all, onto your hot surface.
- If you're using a stone or a sheet, add 1/2 cup of ice to the cast-iron pan when you put the dough in the oven to create steam. Be careful to stand back and step away immediately! If you're using a pot, there's no need for that—simply close the lid (be careful—it's hot!) when you add the dough. This will generate enough steam within the pot.
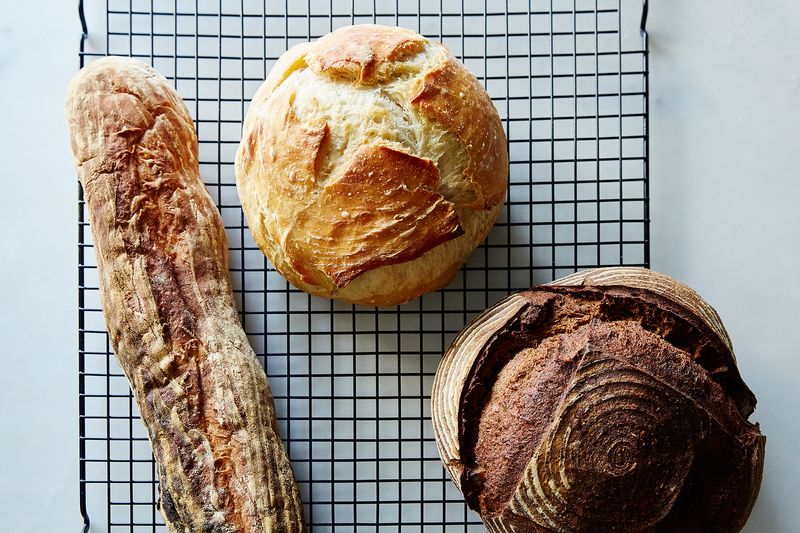
- Check the bread after 20 minutes. If using a Dutch oven, this is when you should remove the lid and let the crust get dark. When the crust is very brown and firm, remove from the oven (tap the bottom—if it sounds hollow, it's done) and let cool completely on a wire rack.
Комментариев нет:
Отправить комментарий